
Maturity age
Red-Eared sliders will be mature enough for breeding at about 5 years of age, this is when the female shell size is about 15 cms (about 6 inches).
Mating dance
The mating dance of this species is very elaborated and interesting to observe. The male swims towards the female and starts caressing her face with his long front claws. He might also swim around her in circles. He might also strike her front shell lightly with his claws (this looks as if his front leggs are trembling). If she is receptive, she will accept him, otherwise, a fight might start. If after 45 minutes, the female is not receptive to the male's dance, you should remove her from the tank and try again in about two days. The mating itself takes about 15 minutes.
Mating tank size
Use a 30 gallon tank. Keep the water warm but shallow (About 5 inches), since during the mating the male might get so concentrated that he might forget that the female has to go out for breathing!.
After mating
It is advisable during pregnancy to keep the female separate from the male, so that she will not get disturbed so much. You should handle her ONLY when absolutely necessary. Keep the water very clean and give her enough space. Heating is also very important as they will spend a lot of time basking to warm themselves and the eggs inside. You might notice a change in the appetite of the female, she might refuse to eat. This is normal. Nevertheless, continue offering her food and consider a dietary change, she might feel inclined to eat certain things only.
Nesting quarters
Prepare a 20 gallon tank with about 4 inches of potting soil or soil/vermiculite mixture.
Laying eggs
The average gestation period is two months, but if she doesn't find a suitable place for laying her eggs, she might retain them inside. During the last two weeks you will notice that she will want to spend more time on land, sniffing and digging around inorder to find a proper place for laying her leggs. At this point, you need to place the female in the nesting quarters. Try to watch her as much as you can to see where she lays the eggs. She might lay from 2 to 20 eggs.
not?
Some keepers prefer to leave the eggs where they were laid. A good point of doing so is that they do not need to handle the eggs, digging them out could dammage some of them. A bad point is that monitoring buried eggs could be a bit difficult. The worst that could happen is that one egg goes bad, gets fungi that then spreads to the other eggs... or some of the hatchilings might have a problem digging their way out.
Incubation box
If you decide to remove the eggs to incubate them, you will need to prepare an incubation box. You can use a large plastic sweater box or a plastic shoebox. ( Plastic boxes are good since they can be throughly cleaned and keeps well the moisture.) Drill a series of small holes into the lid for ventilation. (Make no more than a dozen holes of about a quarter of an inch in diameter). Then, set up a bedding in the container of about 2 inches of vermiculite. Use the heavy grain rather than the fine one. Moisten the vermiculite evenly. Make sure it is DAMP and not WET.
Removing the eggs
This process has to be done very carefully. Scoop back small sections of the substrate around the next, very slowly and carefully, trying to feel the eggs with your fingers at the same time. Once you find an egg, before removing it, get a water based felt-tipped marker and make a small mark on the top of the shell. This is important since you need to place the eggs in the same position the turtle layed them. Once you have transfered all the eggs to the incubation box, set it somewhere where it will not be disturbed . Check the eggs a few days after by just removing the lid, but don't handle them! Check for rotten eggs, which you should throuw away immediately. If you see that an egg is developing fungi, you can remove the fungi with a 50/50 solution of antiseptic mouthwash and water, which you should apply carefully with a paintbrush.
Hatching
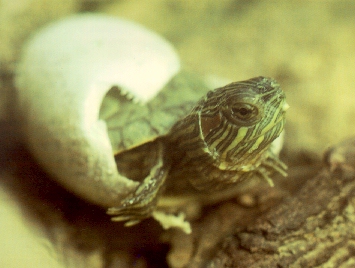
You should start to observe the eggs more carefully about 80 to 85 days after they had been laid. Hatching time is comming! Once the time comes, the hatchings will cut the egg shell with something called the egg tooth, which falls out about an hour later and never grows back. If they don't feel secure, they will remain inside their shells. Do not try to take them out until they have come out on their own. (they might not come out until the following day). Once they come out, you will notice a small sack hanging out of their bellies. This is the yolk sac that fed them while they were incubating. DO NOT try to remove this sac, trying to remove it can kill the baby turtle. It is better to wait that it drops on its own. Once it drops, you will notice a split in the plastron. This will heal by itself too, you don't need to treat it.
Care of the hatchlings

Set them on a 20 gallon tank per dozen. Provide them with a dry land area and a shallow water area. Newborns need to master the art of floating and staying underwater for long periods of time. Don't assume that they will survive only with water. Newborn red-eared sliders can actually drown if you neglect them a dry land area. Once they are set up in their tank start feeding them. It is important to get them to eat. Start by offering them one by one all items on the proper slider diet. Note: You might have to 'chop' all of the food you offer since they are small babies. This includes choping earthworms, mealworms, crickets. I know, this sounds disgusting but believe me, you will get used to after a while and it won't bother you anymore. As with addult sliders, newborns need to have their full spectrum light. So don't forget to include that in the tank. The full spectrum light will help the newborn shells to harden. Keep the water neatly clean. If you don't have a filter change the water every two days. This is very important since baby sliders are more prone to getting eye infecitions (that can leave them blind for life or even kill them) than adult sliders.
